How to Install Free SSL Certificate on Zimbra Mail Server

In the article Install Zimbra Mail Server on CentOS 8, we learned to install Zimbra on CentOS. This article discusses the steps required to install the Let’s Encrypt free SSL certificate in Zimbra.
Installing Free SSL Certificate on Zimbra: Method 1
This method is a proven one though you have to manually do all the steps. Another method discussed below is partially automatic, which might come in handy if you didn’t encounter any error during installation (working at the time of writing this article). So, let’s begin with method 1.
First of all, add epel repository to the server
[root@mail ~]# yum -y install epel-release
Install snapd
Now, install snapd package with the following command
[root@mail ~]# sudo yum install snapd
After the above step, you need to enable snapd.
[root@mail ~]# sudo systemctl enable --now snapd.socket
Sometimes, the above command isn’t sufficient. Therefore, to enable classic snap support, create a symbolic link between /var/lib/snapd/snap and /snap:
[root@mail ~]# sudo ln -s /var/lib/snapd/snap /snap
Now install snap core
[root@mail ~]# sudo snap install core; sudo snap refresh core
Install certbot
Now, we need to get certbot
[root@mail ~]# sudo snap install --classic certbot
After that, prepare the certbot command
[root@mail ~]# sudo ln -s /snap/bin/certbot /usr/bin/certbot
Now, get the certificate
[root@mail ~]# sudo certbot certonly --standalone --preferred-chain "ISRG Root X1"
Saving debug log to /var/log/letsencrypt/letsencrypt.log

How would you like to authenticate with the ACME CA?
- - - - - - - - - - - - - - - - - - - - - - - - - - - - - - - - - - - - - - - -
1: Spin up a temporary webserver (standalone)
2: Place files in webroot directory (webroot)
- - - - - - - - - - - - - - - - - - - - - - - - - - - - - - - - - - - - - - - -
Next, answer 1 and enter the domain as mail.yourdomain.com
Select the appropriate number [1-2] then [enter] (press 'c' to cancel): 1
Plugins selected: Authenticator standalone, Installer None
Please enter in your domain name(s) (comma and/or space separated)  (Enter 'c'
to cancel): mail.ingu.pw
Requesting a certificate for mail.ingu.pw
Performing the following challenges:
http-01 challenge for mail.ingu.pw
Waiting for verification...
Cleaning up challenges
Subscribe to the EFF mailing list (email: [email protected]).

IMPORTANT NOTES:
 - Congratulations! Your certificate and chain have been saved at:
   /etc/letsencrypt/live/mail.ingu.pw/fullchain.pem
   Your key file has been saved at:
   /etc/letsencrypt/live/mail.ingu.pw/privkey.pem
   Your certificate will expire on 2021-08-07. To obtain a new or
   tweaked version of this certificate in the future, simply run
   certbot again. To non-interactively renew *all* of your
   certificates, run "certbot renew"
 - If you like Certbot, please consider supporting our work by:

   Donating to ISRG / Let's Encrypt:   https://letsencrypt.org/donate
   Donating to EFF:                    https://eff.org/donate-le
Installing Certificate
Now copy the privkey.pem to the directory as written in commnad.
[root@mail ~]# cp /etc/letsencrypt/live/mail.ingu.pw/privkey.pem /opt/zimbra/ssl/zimbra/commercial/commercial.key
[root@mail ~]# chown zimbra:zimbra /opt/zimbra/ssl/zimbra/commercial/commercial.key
Next, you need to edit chain.pem file and append root CA to it. Actually, Let’s Encrypt generate chain.pem file without the root CA. Therefore, you must use the IdenTrust root Certificate and merge it and append it in chain.pem. To get the IdenTrust root Certificate go to the following link.
[root@mail ~]# wget -O /tmp/ISRG-X1.pem https://letsencrypt.org/certs/isrgrootx1.pem.txt
[root@mail ~]# cat /tmp/ISRG-X1.pem >> /etc/letsencrypt/live/mail.ingu.pw/chain.pem
Verify your certificate
Now create a directory /opt/zimbra/ssl/letsencrypt and copy all the certificate files.
[root@mail ~]:~# mkdir /opt/zimbra/ssl/letsencrypt
[root@mail ~]# cp /etc/letsencrypt/live/mail.yourdomain.com/* /opt/zimbra/ssl/letsencrypt/
Next change the ownership of files.
[root@mail ~]# chown zimbra:zimbra /opt/zimbra/ssl/letsencrypt/*
[root@mail ~]# ls -la /opt/zimbra/ssl/letsencrypt/
After that switch to zimbra user and change working directory.
[root@mail ~]# su zimbra
[zimbra@mail root]$ cd  /opt/zimbra/ssl/letsencrypt/
Now, it’s time to verify the certificate finally.
[zimbra@mail letsencrypt]$ /opt/zimbra/bin/zmcertmgr verifycrt comm privkey.pem cert.pem chain.pem
** Verifying 'cert.pem' against 'privkey.pem'
Certificate 'cert.pem' and private key 'privkey.pem' match.
** Verifying 'cert.pem' against 'chain.pem'
Valid certificate chain: cert.pem: OK
You will get OK message at the end of successful verification.
Deploy Certificate
After all the hard work finally, you have reached the deployment stage. Execute the following 2 commands to finish SSL installation.
[zimbra@mail letsencrypt]$ cp /opt/zimbra/ssl/letsencrypt/privkey.pem /opt/zimbra/ssl/zimbra/commercial/commercial.key

[zimbra@mail letsencrypt]$ /opt/zimbra/bin/zmcertmgr deploycrt comm cert.pem chain.pem

** Verifying 'cert.pem' against '/opt/zimbra/ssl/zimbra/commercial/commercial.key'
Certificate 'cert.pem' and private key '/opt/zimbra/ssl/zimbra/commercial/commercial.key' match.
** Verifying 'cert.pem' against 'chain.pem'
Valid certificate chain: cert.pem: OK
** Copying 'cert.pem' to '/opt/zimbra/ssl/zimbra/commercial/commercial.crt'
** Copying 'chain.pem' to '/opt/zimbra/ssl/zimbra/commercial/commercial_ca.crt'
** Appending ca chain 'chain.pem' to '/opt/zimbra/ssl/zimbra/commercial/commercial.crt'
** Importing cert '/opt/zimbra/ssl/zimbra/commercial/commercial_ca.crt' as 'zcs-user-commercial_ca' into cacerts '/opt/zimbra/common/lib/jvm/java/lib/security/cacerts'
** NOTE: restart mailboxd to use the imported certificate.
** Saving config key 'zimbraSSLCertificate' via zmprov modifyServer mail.ingu.pw...ok
** Saving config key 'zimbraSSLPrivateKey' via zmprov modifyServer mail.ingu.pw...ok
** Installing imapd certificate '/opt/zimbra/conf/imapd.crt' and key '/opt/zimbra/conf/imapd.key'
** Copying '/opt/zimbra/ssl/zimbra/commercial/commercial.crt' to '/opt/zimbra/conf/imapd.crt'
** Copying '/opt/zimbra/ssl/zimbra/commercial/commercial.key' to '/opt/zimbra/conf/imapd.key'
** Creating file '/opt/zimbra/ssl/zimbra/jetty.pkcs12'
** Creating keystore '/opt/zimbra/conf/imapd.keystore'
** Installing ldap certificate '/opt/zimbra/conf/slapd.crt' and key '/opt/zimbra/conf/slapd.key'
** Copying '/opt/zimbra/ssl/zimbra/commercial/commercial.crt' to '/opt/zimbra/conf/slapd.crt'
** Copying '/opt/zimbra/ssl/zimbra/commercial/commercial.key' to '/opt/zimbra/conf/slapd.key'
** Creating file '/opt/zimbra/ssl/zimbra/jetty.pkcs12'
** Creating keystore '/opt/zimbra/mailboxd/etc/keystore'
** Installing mta certificate '/opt/zimbra/conf/smtpd.crt' and key '/opt/zimbra/conf/smtpd.key'
** Copying '/opt/zimbra/ssl/zimbra/commercial/commercial.crt' to '/opt/zimbra/conf/smtpd.crt'
** Copying '/opt/zimbra/ssl/zimbra/commercial/commercial.key' to '/opt/zimbra/conf/smtpd.key'
** Installing proxy certificate '/opt/zimbra/conf/nginx.crt' and key '/opt/zimbra/conf/nginx.key'
** Copying '/opt/zimbra/ssl/zimbra/commercial/commercial.crt' to '/opt/zimbra/conf/nginx.crt'
** Copying '/opt/zimbra/ssl/zimbra/commercial/commercial.key' to '/opt/zimbra/conf/nginx.key'
** NOTE: restart services to use the new certificates.
** Cleaning up 3 files from '/opt/zimbra/conf/ca'
** Removing /opt/zimbra/conf/ca/c9124eb4.0
** Removing /opt/zimbra/conf/ca/ca.pem
** Removing /opt/zimbra/conf/ca/ca.key
** Copying CA to /opt/zimbra/conf/ca
** Copying '/opt/zimbra/ssl/zimbra/ca/ca.key' to '/opt/zimbra/conf/ca/ca.key'
** Copying '/opt/zimbra/ssl/zimbra/ca/ca.pem' to '/opt/zimbra/conf/ca/ca.pem'
** Creating CA hash symlink 'c9124eb4.0' -> 'ca.pem'
** Creating /opt/zimbra/conf/ca/commercial_ca_1.crt
** Creating CA hash symlink '8d33f237.0' -> 'commercial_ca_1.crt'
** Creating /opt/zimbra/conf/ca/commercial_ca_2.crt
** Creating CA hash symlink '4042bcee.0' -> 'commercial_ca_2.crt'
** Creating /opt/zimbra/conf/ca/commercial_ca_3.crt
** Creating CA hash symlink '2e5ac55d.0' -> 'commercial_ca_3.crt'
At last, just restart the Zimbra services to reload newly installed cerificate
[zimbra@mail letsencrypt]$ zmcontrol restart
Host mail.ingu.pw
        Stopping zmconfigd...Done.
        Stopping zimlet webapp...Done.
        Stopping zimbraAdmin webapp...Done.
        Stopping zimbra webapp...Done.
        Stopping service webapp...Done.
        Stopping stats...Done.
        Stopping mta...Done.
        Stopping spell...Done.
        Stopping snmp...Done.
        Stopping cbpolicyd...Done.
        Stopping archiving...Done.
        Stopping opendkim...Done.
        Stopping amavis...Done.
        Stopping antivirus...Done.
        Stopping antispam...Done.
        Stopping proxy...Done.
        Stopping memcached...Done.
        Stopping mailbox...Done.
        Stopping logger...Done.
        Stopping dnscache...Done.
        Stopping ldap...Done.
Host mail.ingu.pw
        Starting ldap...Done.
        Starting zmconfigd...Done.
        Starting logger...Done.
        Starting mailbox...Done.
        Starting memcached...Done.
        Starting proxy...Done.
        Starting amavis...Done.
        Starting antispam...Done.
        Starting antivirus...Done.
        Starting opendkim...Done.
        Starting snmp...Done.
        Starting spell...Done.
        Starting mta...Done.
        Starting stats...Done.
        Starting service webapp...Done.
        Starting zimbra webapp...Done.
        Starting zimbraAdmin webapp...Done.
        Starting zimlet webapp...Done.
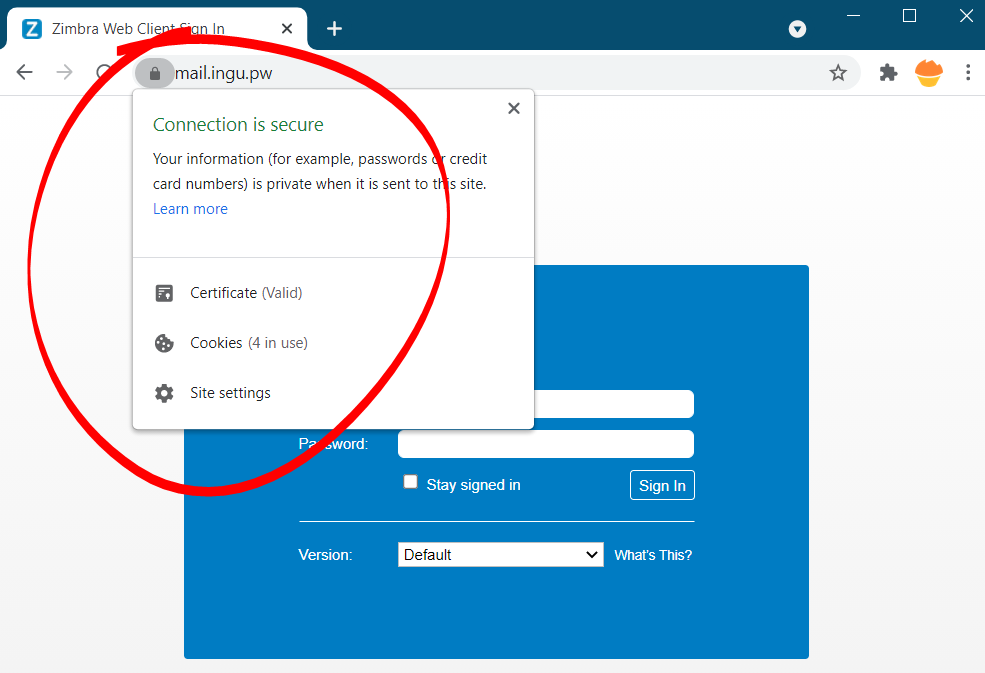
Now, go and check new SSL certificate in browser
Test Automatic Renewal
The certbot packages are pre configured to automatically renew SSL certificate before expiry. You don’t have to execute any command in order to renew the certificate, unless you have changed the configuration. However, here’s the command which will simulate the automatic renewal and confirm the working of cron or systemd properly.
[root@mail ~]# sudo certbot renew --dry-run
Saving debug log to /var/log/letsencrypt/letsencrypt.log

- - - - - - - - - - - - - - - - - - - - - - - - - - - - - - - - - - - - - - - -
Processing /etc/letsencrypt/renewal/mail.ingu.pw.conf
- - - - - - - - - - - - - - - - - - - - - - - - - - - - - - - - - - - - - - - -
Cert not due for renewal, but simulating renewal for dry run
Plugins selected: Authenticator standalone, Installer None
Account registered.
Simulating renewal of an existing certificate for mail.ingu.pw
Performing the following challenges:
http-01 challenge for mail.ingu.pw
Waiting for verification...
Cleaning up challenges

- - - - - - - - - - - - - - - - - - - - - - - - - - - - - - - - - - - - - - - -
new certificate deployed without reload, fullchain is
/etc/letsencrypt/live/mail.ingu.pw/fullchain.pem
- - - - - - - - - - - - - - - - - - - - - - - - - - - - - - - - - - - - - - - -

- - - - - - - - - - - - - - - - - - - - - - - - - - - - - - - - - - - - - - - -
Congratulations, all simulated renewals succeeded:
  /etc/letsencrypt/live/mail.ingu.pw/fullchain.pem (success)
- - - - - - - - - - - - - - - - - - - - - - - - - - - - - - - - - - - - - - - -
This method though little lengthy, but it is guaranteed to work 99% of the time.
Installing Free SSL Certificate on Zimbra: Method 2
This method make use of popular YetOpen script maintained by community on GitHub.
In order to make use of this method you have to configure Zimbra Proxy. Basically Zimbra by default didn’t configure nginx to listen on port 80. Therefore, certbot is likely to fail without configuring Zimbra Proxy.
Set default Zimbra proxy ports for web, pop3, imap and admin
First of all switch to zimbra (su zimbra) user and execute the following command
[zimbra@mail ~]# /opt/zimbra/libexec/zmproxyconfig -e -w -o -a 8080:80:8443:443 -x https -H `zmhostname`
[zimbra@mail ~]# /opt/zimbra/libexec/zmproxyconfig -e -m -o -i 7143:143:7993:993 -p 7110:110:7995:995 -H `zmhostname`
[zimbra@mail ~]# /opt/zimbra/libexec/zmproxyconfig -e -m -H `zmhostname`
Enable reverse proxy
[zimbra@mail ~]# zmprov ms `zmhostname` zimbraMailReferMode reverse-proxied
After that enable memcached
[zimbra@mail ~]# zmprov ms `zmhostname` +zimbraServiceEnabled memcached
Enable redirect mode
Now, you will definitely want all your webmail traffic to go via https by default. But http must be enabled for certbot to work.
[zimbra@mail ~]# zmprov ms `zmhostname` zimbraReverseProxyMailMode redirect
[zimbra@mail ~]# exit
After you have configured proxy, it’s time to install certbot-zimbra.
Install Certbot-Zimbra
First of all install certbot-zimbra. To download latest version execute the following command
[root@mail ~]# wget --content-disposition https://github.com/YetOpen/certbot-zimbra/archive/0.7.12.tar.gz
Then install tar and extract the file with following command
[root@mail ~]# tar xzf certbot-zimbra-0.7.12.tar.gz certbot_zimbra.sh
[root@mail ~]# chmod +x certbot_zimbra.sh
[root@mail ~]# mv certbot_zimbra.sh /usr/local/bin/
After that, move the file certbot_zimbra.sh to bin folder using following command.
[root@mail ~]# mv certbot-zimbra-0.7.12/certbot_zimbra.sh /usr/local/bin/
Go to bin folder
[root@mail ~]# cd /usr/local/bin
Deploy Certificate
The beauty of YetOpen is it can do everything for you, including deploying the certificate and restarting Zimbra. In contrast to other process where you have to do manually this process is automatic.
[root@mail bin]# ./certbot_zimbra.sh -n -c
After that answer the questions
[root@mail bin]# ./certbot_zimbra.sh -n -c
certbot-zimbra v0.7.11 - https://github.com/YetOpen/certbot-zimbra
Checking for dependencies...
Detected Zimbra 8.8.15 on RHEL8_64
Using zmhostname to detect domain.
Using domain mail.inlearn.in (as certificate DN)
Is this correct? yes
Detecting additional public service hostnames...
Apart from above usage, you can also do more with YetOpen script. Check out the official guide to learn more.
Renewal of Certificate YetOpen
YetOpen provides two ways to renew the certificate automatically, one through crontab and other through systemmd. Here, I have listed crontab method only.
Renewal using crontab
Edit the crontab using the command
[root@mail ~]# crontab -e
Then schedule the command below to renew the certificate, so that it doesn’t interfere in your working hours. This is because after certificate renewal zmcontrol will restart Zimbra, which takes one or two minutes (I hope you already know that)
# Replace /usr/bin/certbot with the location of your certbot binary, use this to find it: which certbot-auto certbot letsencrypt
12 5 * * * root /usr/bin/certbot renew --pre-hook "/usr/local/bin/certbot_zimbra.sh -p" --deploy-hook "/usr/local/bin/certbot_zimbra.sh -d"
Conclusion
Similar to installation of Zimbra, free SSL certificate installation is little complex and easy to lose temper over it. I have tried to make things as simple as possible. Let me know in the comment what improvement can be done.

Followed directions for configuring the proxy. get an error: Problem binding to port 80: Could not bind to IPv4 or IPv6
Thanks for your tutorial.
But now, after following method 1, I have full disk status:
/var/lib/snapd/snap/certbot/1280 on device /dev/loop3 at 100%
Do you have any solution ?
Thanks for nice article, I have successful installed the certificate on my zimbra mail.
Hello Sir,
I have this error while installing the ssl certificat
Could you please help me out ?
zimbra@mail letsencrypt]$ /opt/zimbra/bin/zmcertmgr verifycrt comm privkey.pem cert.pem chain.pem
** Verifying ‘cert.pem’ against ‘privkey.pem’
Certificate ‘cert.pem’ and private key ‘privkey.pem’ match.
** Verifying ‘cert.pem’ against ‘chain.pem’
ERROR: Unable to validate certificate chain: O = Digital Signature Trust Co., CN = DST Root CA X3
error 10 at 3 depth lookup: certificate has expired
error cert.pem: verification failed
I don’t know where I can download the new certificate
Thank you in advance
Regards
Hello
I am facing the same issue
Could you help me out ?
Regards
Hello
I am facing the same issue
Could you help me out ?
Regards
Hello Sir,
I have this error while installing the ssl certificat
Could you please help me out?
zimbra@test:~/ssl/letsencrypt$ /opt/zimbra/bin/zmcertmgr verifycrt comm privkey.pem cert.pem chain.pem
** Verifying ‘cert.pem’ against ‘privkey.pem’
Certificate ‘cert.pem’ and private key ‘privkey.pem’ match.
** Verifying ‘cert.pem’ against ‘chain.pem’
ERROR: Unable to validate certificate chain: cert.pem: O = Digital Signature Trust Co., CN = DST Root CA X3
error 10 at 3 depth lookup:certificate has expired
OK
Are you using premium SSL? You can ask the provider for Zimbra guide. Almost all major service providers have guide for zimbra.
Are you using premium SSL? You can ask the provider for Zimbra guide. Almost all major service providers have guides for Zimbra.
No i am not using Premium SSL, I am using free SSL
Hello i used
https://letsencrypt.org/certs/trustid-x3-root.pem.txt
but it error
[zimbra@mail letsencrypt]$ /opt/zimbra/bin/zmcertmgr verifycrt comm privkey.pem cert.pem chain.pem
** Verifying ‘cert.pem’ against ‘privkey.pem’
Certificate ‘cert.pem’ and private key ‘privkey.pem’ match.
** Verifying ‘cert.pem’ against ‘chain.pem’
ERROR: Unable to validate certificate chain: O = Digital Signature Trust Co., CN = DST Root CA X3
error 10 at 3 depth lookup: certificate has expired
error cert.pem: verification failed
I try using this
Installing Free SSL Certificate on Zimbra: Method 2
but now my zimbra proxy is not working
I have followed all the steps but it give me this below error
Error
** Verifying ‘cert.pem’ against ‘privkey.pem’
139958131300160:error:0607907F:digital envelope routines:EVP_PKEY_get0_RSA:expecting an rsa key:crypto/evp/p_lib.c:474:
ERROR: Certificate ‘cert.pem’ and private key ‘privkey.pem’ do not match.
Hi, look at the bottom here https://github.com/YetOpen/certbot-zimbra , in the “Troubleshooting” section ; reading it i think you should use the latest version of certbot_zimbra.sh wich actually is 0.7.13 . It’s still in beta but i used it and it’s working good for me.
Hope it help, Good luck 🙂
Thanks for your tutorial.
But now, after following method 1, I have full disk status:
Jan 17 14:40:36 mail zimbramon[2014]: 2014:crit: Disk warning: mail.ekom.ca: /var/lib/snapd/snap/core/16202 on device /dev/loop0 at 100%
Jan 17 14:40:36 mail zimbramon[2014]: 2014:crit: Disk warning: mail.ekom.ca: /var/lib/snapd/snap/certbot/3566 on device /dev/loop2 at 100%
every minute do you have any solution of this ? thanks
HI, My SSL certificate has been succussfully installed,
Kindly also tell me that how we can install SSL for another domain within the same Zimbra Email Server, actually i have two different domains in Zimbra, but i have done the same for 2nd domain but facing an issue,
Thanks
Irfan Alam