Build Postal SMTP Server & Send Bulk Emails Step by Step on Ubuntu 22.04

Building a Postal SMTP server to send bulk emails is a good choice for email marketers. Postal is very powerful and backed by a large community of developers. It is an open-source mail server script written in JavaScript and Ruby. It can be used to build in-house SMTP servers just like Mailgun, Sendgrid, Mailchimp, etc.
Postal installation is not very straightforward. The process is fairly complex. It’s because Postal needs several packages to be installed beforehand, it can be used. I have tried to make it as simple as possible.
Requirement for Postal SMTP server
- A domain name from Namecheap or Namesilo
- A VPS or cloud with a minimum of 4 GB RAM and 2 vCPU
- Operating System: Ubuntu 22.04 or Ubuntu 20.04
I am using Contabo for demonstration.
Initial Setup
To start with installation, you will need to connect to the server. If you are on you have to get an SSH client for this purpose. One such SSH client is Putty. But if you are on Linux or Mac, just open the terminal and type [email protected] where xx.x.x.xxx is your server IP address.
First of all switch to root user
sudo -i
After that update and upgrade your Ubuntu
apt update -y
apt upgrade -y
Next set up the hostname. Replace “example.com” with your domain name.
hostnamectl set-hostname postal.yourdomain.com
Updating DNS records
Login to the domain registrar and create A record for mail.example.com
Now let’s begin with the installation.
Installing Docker and Docker-Compose
Recently postal team switched to docker mode to make installation easier for the end users. Therefore we need to install Docker and Docker-Compose first. I already have discussed what is docker, docker-compose & installation steps in detail. Feel free to read the article to have a clear understanding of docker.
Installing Docker
First of all, set a few packages to set up the Docker repository
sudo apt-get install ca-certificates curl gnupg
Next, add Docker’s official GPG key.
sudo install -m 0755 -d /etc/apt/keyrings
curl -fsSL https://download.docker.com/linux/ubuntu/gpg | sudo gpg --dearmor -o /etc/apt/keyrings/docker.gpg
sudo chmod a+r /etc/apt/keyrings/docker.gpg
Now, you can install the Docker repository using the following commands
echo \
  "deb [arch=$(dpkg --print-architecture) signed-by=/etc/apt/keyrings/docker.gpg] https://download.docker.com/linux/ubuntu \
  $(. /etc/os-release && echo "$VERSION_CODENAME") stable" | \
  sudo tee /etc/apt/sources.list.d/docker.list > /dev/null
Next update the system software
sudo apt-get update -y
Finally, run the following command to install Docker Engine and containerd.
sudo apt-get install docker-ce docker-ce-cli containerd.io docker-buildx-plugin docker-compose-plugin
Installing Docker-Compose
First of all download the current stable release of Docker Compose:
curl -SL https://github.com/docker/compose/releases/download/v2.23.3/docker-compose-linux-x86_64 -o /usr/local/bin/docker-compose
Next, update the permission to binary
sudo chmod +x /usr/local/bin/docker-compose
Also, create a symlink as well
sudo ln -s /usr/local/bin/docker-compose /usr/bin/docker-compose
Finally, test the docker-compose installation
docker-compose --version
You will see the docker-compose version. If you see anything else this means something has gone wrong.
Installing Additional Prerequisites for Postal SMTP
After installation of Docker and Docker-compose, you need to install a few other packages like Git, MariaDB, etc.
So, let’s install them one by one.
First, install git and git curl
apt install git curl jq -y
Next clone the postal helper repository
git clone https://github.com/postalserver/install /opt/postal/install
sudo ln -s /opt/postal/install/bin/postal /usr/bin/postal
Installing MariaDB
Now, you can install MariaDB in the docker container
docker run -d \
   --name postal-mariadb \
   -p 127.0.0.1:3306:3306 \
   --restart always \
   -e MARIADB_DATABASE=postal \
   -e MARIADB_ROOT_PASSWORD=postalpassword \
   mariadb
Now we have installed all the prerequisite packages, it’s time to install Postal
Note: RabbitMQ is no longer required in current version of postal. Therefore this part has been removed from the article.
Installing Postal
The postal repository, you installed earlier, is capable of generating some configuration files to use
Run the following command.
postal bootstrap postal.yourdomain.com
The above command generates 3 files. Out of which postal.yml is of our interest.
You need to edit the postal.yml and make changes. But before that install an editor. I suggest installing nano.
apt install nano -y
Now to edit postal.yml run the following command
nano /opt/postal/config/postal.yml
You will see output something like this
version: 2

postal:
  web_hostname: postal.yourdomain.com
  web_protocol: https
  smtp_hostname: postal.yourdomain.com

main_db:
  host: 127.0.0.1
  username: root
  password: postalpassword
  database: postal

message_db:
  host: 127.0.0.1
  username: root
  password: postalpassword
  prefix: postal

smtp_server:
  default_bind_address: "::"

dns:
  # Specify the DNS records that you have configured. Refer to the documentation at
  # https://github.com/atech/postal/wiki/Domains-&-DNS-Configuration for further
  # information about these.
  mx_records:
    - mx.postal.yourdomain.com
  spf_include: spf.postal.yourdomain.com
  return_path_domain: rp.postal.yourdomain.com
  route_domain: routes.postal.yourdomain.com
  track_domain: track.postal.yourdomain.com

smtp:
  # Specify an SMTP server that can be used to send messages from the Postal management
  # system to users. You can configure this to use a Postal mail server once the
  # your installation has been set up.
  host: 127.0.0.1
  port: 2525
  username: # Complete when Postal is running and you can
  password: # generate the credentials within the interface.
  from_name: Postal
  from_address: postal.yourdomain.com

rails:
  # This is generated automatically by the config initialization. It should be a random
  # string unique to your installation.
  secret_key: 2f271404e1fac638bf546b0ee4b6485c713351aba71291ae55253f345d0dc045c0450a5750e7ca2bbd2068628d5a2253454cca352c46ea9d9804ed59cbe8a027b24dc74bcadd3b50ae21138a61d344609d13f0875caf21c53681e5289868194f756a8c34e2409b8ec92e3e149c13fe4e08dc6cbdb04bb02bc8943d1ff8faeae6
Make sure to modify database passwords in above file. Cross-check other settings and then save and close the file with CTRL + X.
Initializing Database
Initializing Database is super easy, just execute the following command and you will see database tables were getting created in the output.
postal initialize
After that, it’s time to build postal
postal make-user
You will be asked for the email id, name, and password of the admin user. Type the answer and then go to the next step.
Starting & Running Postal
Starting and running postal is also super easy. Just run the following command.
postal start
You can check the status of postal
postal status
Installing Caddy
This is a new feature added by the Postal team to install SSL automatically.
docker run -d \
   --name postal-caddy \
   --restart always \
   --network host \
   -v /opt/postal/config/Caddyfile:/etc/caddy/Caddyfile \
   -v /opt/postal/caddy-data:/data \
   caddy
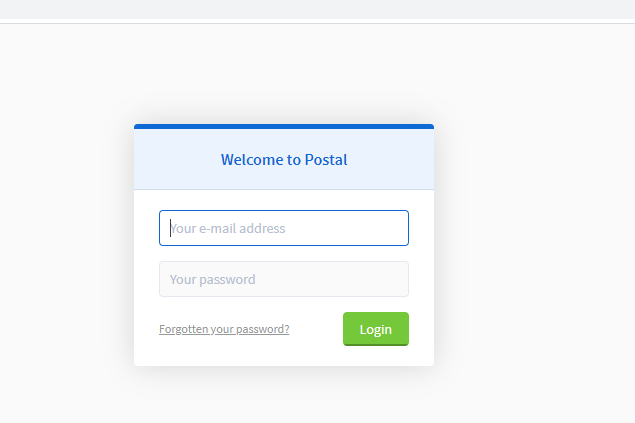
Now you can go to https://postal.yourdomain.com and log in using admin credentials. You will see the admin page something like this.
In, the next article we will learn to create an organization, domain management, SMTP creation, etc.
Conclusion
Installing Postal is no longer a complex procedure. Since postal is open source and freeware, it would be a good start.


I totally love your tutorial, you saved me from allt of stress, thank you.. i was able to spin up mine.
Can you update the content with a link to your GitHub for the DNS config
How can i install postal to send 100k + emails by using Ips rotation
You can install postal following this guide and video. But for sending 100k you need to get few IPs to rotate. Let me know if you need my help.
Thanks for your reply. I bought several ips from contabo. I have followed your video and install postal successfuly. I have tried to Build a new mail server in postal, after adding a server name, I click on the build server button, it was just loading and loading without building any server. I can give you my postal login details, so you can see that my postal cannot build mail server
Seems like an issue with mysql connection or perhaps wrong username and password to rabbitmq. Can you cross-check credentials that you entered in postal.yml
If issue doesn’t resolve email me the credentials at [email protected]
Hi Sir
I have the same error where I install postal also create organization successfully where i try to build a mail server just loading and loading. i have already check yml config file but don’t get any error but in postal status, i receive the below status msg, Please help
postal_cron_1 /docker-entrypoint.sh post … Up
postal_requeuer_1 /docker-entrypoint.sh post … Up
postal_smtp_1 /docker-entrypoint.sh post … Exit 1
postal_web_1 /docker-entrypoint.sh post … Up
postal_worker_1 /docker-entrypoint.sh post … Up
Check postal configuration file.
Why do you think i got this error?sudo apt-get install ruby2.3 ruby2.3-dev build-essential -y
Reading package lists… Done
Building dependency tree
Reading state information… Done
Package ruby2.3 is not available, but is referred to by another package.
This may mean that the package is missing, has been obsoleted, or
is only available from another source
Package ruby2.3-dev is not available, but is referred to by another package.
This may mean that the package is missing, has been obsoleted, or
is only available from another source
E: Package ‘ruby2.3’ has no installation candidate
E: Package ‘ruby2.3-dev’ has no installation candidate
I have updated the article to include ruby 2.6
Can you try again with an updated set of commands?
Also, do let me know the outcome.
Cheers 😀
Thank you very much it does work
Yes, unless your VPS from another world it should work. I have tested it on Ubuntu 18.04.
I got this error again when using this commend:
sudo gem install nokogiri -v ‘1.7.2’
Building native extensions. This could take a while…
ERROR: Error installing nokogiri:
ERROR: Failed to build gem native extension.
current directory: /var/lib/gems/2.7.0/gems/nokogiri-1.7.2/ext/nokogiri
/usr/bin/ruby2.7 -I /usr/lib/ruby/2.7.0 -r ./siteconf20210424-238639-mr7f7o.rb extconf.rb
checking if the C compiler accepts … yes
Building nokogiri using packaged libraries.
Using mini_portile version 2.1.0
After that, install all the required dependencies with the following command:
1. postal bundle /opt/postal/vendor/bundle
“Could not find mail-2.7.2.edge in any of the sources”
Please help me
I have updated the command. Please try again and let me know if the issue persists.
Hi, thank you for your tutorials.
I successfully install and use postal to send email from mautic via smtp (mautic on separated vps).
But there is one problem left, i already use 8gb ram vps and the sending speed only around 50 emails/minute.
I already increase the postal worker and do some mysql tuning that I found on postal github.
Is there anything I could do to fix this? At least i need 500 emails/minute rate. I see on github there is a person who could send 300 emails/min with 4gb vps. So in my opinion I could get better performance.
Before this I am using amazon ses via smtp with same mautic and there is no problem with sending speed rate.
Thank you.
postal make-user gives this error, how to solve this pl.
1: from /opt/postal/vendor/bundle/ruby/2.6.0/gems/mysql2-0.5.3/lib/mysql2/client.rb:90:in `initialize’
/opt/postal/vendor/bundle/ruby/2.6.0/gems/mysql2-0.5.3/lib/mysql2/client.rb:90:in `connect’: Access denied for user ‘postal’@’localhost’ (using password: YES) (Mysql2::Error::ConnectionError)
I will investigate into the issue and will update the article accordingly.
I really love your article. Very nice!
I have a question:
I can only access my Postal server by using ‘http//:mail.mydomain.com:5000’ instead of the correct way is ‘https://mail.mydomain.com’ as your guide.
Kindly help me with how to fix it?
Thanks a lot!
Thanks for pointing it out, I have updated the article. If you like to access it to HTTP then use port 80 and for HTTPS use port 443.
Let me know if it didn’t work.
May I know how to access Postal Server to ‘https://mail.mydomain.com’ not using ‘http://mail.mydomain.com:5000’?
Use port 443 instead of port 5000.
Its saying server not found and its not working with https or http plus 5000, 443,80 all not working Please help me fix this. i followed everything correctly and its still not working.
Hi dhiraj rahul i trie 5000 for https as well as http an also 443 for https and http an also port 80 still it didnt work for me please help us.
With http use port 5000
With https no port is required. It will automatically use 443
Hi, i have one error, when i run postal initialize i got this error:
Access denied for user ‘root’@’172.xx.xx.xx’ (using password: YES)
Couldn’t create ‘postal’ database. Please check your configuration.
Any idea how to solve this? iim using ubuntu 18.04
Thanks
Check the postal.yml file. You might have entered incorrect credentials
Hi Dhiraj,
Thank you or the tutorials, I’ve followed it but run into trouble installing MariaDB
Can’t connect to MySQL server on ‘127.0.0.1’ (115)
Couldn’t create ‘postal’ database. Please check your configuration.
rake aborted!
and
ERROR 1045 (28000): Access denied for user ‘root’@’localhost’ (using password: YES)
I’ve tried uninstalling and installing, resetting the server, changing from ubuntu 18.04 to 20.0, using the old method and the new with docker…
so far nothing works and my frustration is at an all-time high !!!
the worst part is that I had the old version of Postal working but decided to update.
I sent a private email, I hope you can help.
Thanks.
Please try the new docker method. The old method is obsolete now.
Is it possible to install Postal and Mailwizz under samer VPS though Postal is installed using docker?
Yes
Access denied for user ‘root’@’172.17.0.1’ (using password: YES)
Couldn’t create ‘postal’ database. Please check your configuration.
rake aborted!
Mysql2::Error::ConnectionError: Access denied for user ‘root’@’172.17.0.1’ (using password: YES)
pls i tried to do postal initialize, i keep getting this error every time, pls can you help me resolve it. Thanks
Please use the docker version of Postal. Older version is now obsolete.
How do you do that ? I have a digitalocean droplet setup from this great post … but I can’t clear the queues and have zero experience with ssh lol. So I was wondering if it’s possible to have cpanel and all that on the same droplet as this or whatever. Really new to this, been a php / cpanel guy for 20 years.
You can install cpanel on docker, provided you have sufficient knowledge.
Access denied for user ‘root’@’172.17.0.1’ (using password: YES)
Couldn’t create ‘postal’ database. Please check your configuration.
rake aborted!
Mysql2::Error::ConnectionError: Access denied for user ‘root’@’172.17.0.1’ (using password: YES)
Hey Guru,
i got this error message while trying to do postal initialize, please how can you help me solve it.
Thanks
Please use the docker version of Postal. Older version is now obsolete.
Please can you help me with the tutorial url to the new version of the docker to use for postal?
Thanks
i upgraded the docker version to 1.29.2 still not working, pls how can you help?
thank
Hello, I am trying to install SMTP server as per your guideline. But I was stuck in install rabbitmq
Try docker method
Hello, I am trying to install SMTP server as per your guideline. But I was stuck in install rabbitmq server. Can you please guide me on this section. Every time I am getting error for this step. Error: The repository is not signed.
Looking forward to hearing from you.
Thanks
Try docker method.
everything is sorted out. Thanks to your tutorial. But I couldn’t get postal web interface. How to access on postal web interface?
Looking forward to hearing from you.
Thanks
postal_smtp_1 and postal_worker_1 always stop as soon as I start it. I install the postal v2. postal_web_1 is now running and hope it will run all the time. What could be the solution? Looking forward to hearing from you.
Thanks
When I checked the postal logs, I got the error message as below:
bundler: failed to load command: puma (/usr/local/bundle/bin/puma)
Errno::EADDRNOTAVAIL: Cannot assign requested address – bind(2) for “172.105.33.83” port 5000
How the above error can be solved?
Looking forward to hearing from you.
Thanks
Hi,
I would like to install Mautic 4 and Postal on the same VPS. Any install guides to point me in the right direction?
Hello,
thank you so much for the value of your content.
I have been following the process and got stuck at the part where I need to bootstrap to mail.yourdomain.com.
Putty tells me ” can’t connect to mail.mydomain.com ”
Any idea where this comes from ? i though it was DNS pointing wrong but everything seems to be fine.
I would appreciate if you could help figuring out where the problem comes from.
You might have missed any previous step
when i checked postal status its showing this
postal_smtp_1 /docker-entrypoint.sh post … Exit 1
can anyone help
Make sure you have used the correct information in postal.yml file.
exit 1 is related to this only
Hello,
Getting below error when running postal initialize command.
root@postal:~# postal initialize
Pulling web … done
Pulling smtp … done
Pulling worker … done
Pulling cron … done
Pulling requeuer … done
Creating postal_runner_run … done
Initializing database
No secret key was specified in the Postal config file. Using one for just this session
Access denied for user ‘postal’@’172.17.0.1’ (using password: NO)
Couldn’t create ‘postal’ database. Please check your configuration.
rake aborted!
Mysql2::Error::ConnectionError: Access denied for user ‘postal’@’172.17.0.1′ (using password: NO)
/usr/local/bundle/gems/mysql2-0.5.3/lib/mysql2/client.rb:90:in `connect’
/usr/local/bundle/gems/mysql2-0.5.3/lib/mysql2/client.rb:90:in `initialize’
/usr/local/bundle/gems/activerecord-5.2.6/lib/active_record/connection_adapters/mysql2_adapter.rb:22:in `new’
/usr/local/bundle/gems/activerecord-5.2.6/lib/active_record/connection_adapters/mysql2_adapter.rb:22:in `mysql2_connection’
/usr/local/bundle/gems/activerecord-5.2.6/lib/active_record/connection_adapters/abstract/connection_pool.rb:830:in `new_connection’
/usr/local/bundle/gems/activerecord-5.2.6/lib/active_record/connection_adapters/abstract/connection_pool.rb:874:in `checkout_new_connection’
/usr/local/bundle/gems/activerecord-5.2.6/lib/active_record/connection_adapters/abstract/connection_pool.rb:853:in `try_to_checkout_new_connection’
/usr/local/bundle/gems/activerecord-5.2.6/lib/active_record/connection_adapters/abstract/connection_pool.rb:814:in `acquire_connection’
/usr/local/bundle/gems/activerecord-5.2.6/lib/active_record/connection_adapters/abstract/connection_pool.rb:538:in `checkout’
/usr/local/bundle/gems/activerecord-5.2.6/lib/active_record/connection_adapters/abstract/connection_pool.rb:382:in `connection’
/usr/local/bundle/gems/activerecord-5.2.6/lib/active_record/connection_adapters/abstract/connection_pool.rb:1033:in `retrieve_connection’
/usr/local/bundle/gems/activerecord-5.2.6/lib/active_record/connection_handling.rb:118:in `retrieve_connection’
/usr/local/bundle/gems/activerecord-5.2.6/lib/active_record/connection_handling.rb:90:in `connection’
/usr/local/bundle/gems/activerecord-5.2.6/lib/active_record/tasks/mysql_database_tasks.rb:6:in `connection’
/usr/local/bundle/gems/activerecord-5.2.6/lib/active_record/tasks/mysql_database_tasks.rb:14:in `create’
/usr/local/bundle/gems/activerecord-5.2.6/lib/active_record/tasks/database_tasks.rb:119:in `create’
/usr/local/bundle/gems/activerecord-5.2.6/lib/active_record/tasks/database_tasks.rb:139:in `block in create_current’
/usr/local/bundle/gems/activerecord-5.2.6/lib/active_record/tasks/database_tasks.rb:316:in `block in each_current_configuration’
/usr/local/bundle/gems/activerecord-5.2.6/lib/active_record/tasks/database_tasks.rb:313:in `each’
/usr/local/bundle/gems/activerecord-5.2.6/lib/active_record/tasks/database_tasks.rb:313:in `each_current_configuration’
/usr/local/bundle/gems/activerecord-5.2.6/lib/active_record/tasks/database_tasks.rb:138:in `create_current’
/usr/local/bundle/gems/activerecord-5.2.6/lib/active_record/railties/databases.rake:29:in `block (2 levels) in ‘
/opt/postal/app/bin/bundle:3:in `load’
/opt/postal/app/bin/bundle:3:in `’
Tasks: TOP => db:create
(See full trace by running task with –trace)
ERROR: 1
can anyone help
Try the docker method.
I can’t get this file “https://postal.atech.media/packages/stable/latest.tgz”.
You need to use docker method to install postal
I can download this file “https://postal.atech.media/packages/stable/latest.tgz”.
I configured the SMTP using Postal.
When I sent a test the email the email(s) stays in the queue and it gave me this error.:
SMTP send error
Failure sending mail.
Unable to read data from the transport connection: The connection was closed.
How do I remedy?
Perhaps your IP is blacklisted
Thank you for providing such a detailed article, it has been very helpful to me. Continuing with the transportation connection issue, I have verified that my IP is not blacklisted on mxtoolbox. I attempted to send an incoming email, and it was successfully received. Please shed some more lights of any additional hints or use cases that should be checked.
Hi,
Can you please let me know if there is an advantage of getting a server with multipe IP addresses ?
Can a single server use different domains for each of these IP addresses ?
This could help instead of installing multiple servers
Thanks in advance
Yes, it’s beneficial.
Yes, a single server can have different domains and IPs.
thanks very much for your feedback.
The question is, Can Postal handle this, like use many IP addresses and many domains and rotate IP and Domains so that it will reduce the risk of being blacklisted?
Thanks again
Hi
thanks For the video, i have doubt, how to recived email, can you please tell me
Using docker method, after using mariadb and rabbitmq, im getting an error of “invalid reference format”.
Im using putty v0.77(64bit), digitalocean ubuntu 20.04
pls help
Will look into it.
I tried and i successfully did everything with digital ocean. But when trying to send message i keep getting soft fail and it won’t send out. Is it the vps or what do you think is the problem. Thank you
I tried and i successfully did everything with digital ocean. But when trying to send message i keep getting soft fail and it won’t send out. Is it the vps or what do you think is the problem.
It’s the VPS problem. I guess port 25 is blocked.
This site can’t be reachedmail.supportme365.com refused to connect.
Try:
Checking the connection
Checking the proxy and the firewall
ERR_CONNECTION_REFUSED
I receive this message when I try to log in to postal though the status of postal is correct on the server.
please help me out
try accessing on port 5000
please i keep getting this error when i try to login mail.loginmall.live:5000 . my vps from azure how can i fix this
This site can’t be reachedmail.loginmall.live refused to connect.
Try:
Checking the connection
Checking the proxy and the firewall
ERR_CONNECTION_REFUSED
Seems like port 25 is blocked on your server
root@mail:~# postal start
Starting postal_web_1 … done
Starting postal_smtp_1 … done
Starting postal_worker_1 … done
Starting postal_cron_1 … done
Starting postal_requeuer_1 … done
root@mail:~# postal status
Name Command State Ports
——————————————————————
postal_cron_1 /docker-entrypoint.sh post … Up
postal_requeuer_1 /docker-entrypoint.sh post … Up
postal_smtp_1 /docker-entrypoint.sh post … Up
postal_web_1 /docker-entrypoint.sh post … Up
postal_worker_1 /docker-entrypoint.sh post … Up
root@mail:~#
where to set ip for ip pools. have i to do some changes in postal.conf for ip rotation and what to write hostname for external ip.
Please resolve my problem as soon as possible.
please i keep getting this error when i try to login mail.loginmall.live:5000 . what can i do to fix this please
This site can’t be reachedmail.loginmall.live refused to connect.
Try:
Checking the connection
Checking the proxy and the firewall
ERR_CONNECTION_REFUSED
I am getting this message when i am logging on to my mail server – “We’re sorry, but something went wrong.
If you are the application owner check the logs for more information.”
First of all, thank you the detailed tutorial.
I have successfully setup postal and generated my credentials.
I’m running to issues when I try to integrate postal on mailwizz or mautic.
On Mailwizz,
the error is “Cannot send the confirmation email using the data you provided.
×
Here is a transcript of the error message:
Couldn’t send message to API”
I even tried the SMTP credentials to add but for some reason I’m unable to validate my delivery server.
I tested the credentials, tested emails everything works flawlessly but I’m not sure why not the integration.
Please advise.
Thank you
I think you are using incorrect username of postal. Go to credentials > Read more about sending outgoing e-mails
There you will get the username.
Alternatively, you can check your smtp credentials at gmass.co before putting into Mailwizz
Thanks
root@69-49-228-184:~# postal start
[+] Running 5/5
⠿ Container postal-web-1 Started 1.8s
⠿ Container postal-worker-1 Started 1.8s
⠿ Container postal-smtp-1 Started 1.8s
⠿ Container postal-cron-1 Started 1.7s
⠿ Container postal-requeuer-1 Started 1.2s
root@69-49-228-184:~# postal status
NAME IMAGE COMMAND SERVICE CREATED STATUS PORTS
postal-cron-1 ghcr.io/postalserver/postal:2.1.4 “/docker-entrypoint.…” cron 25 seconds ago Up 23 seconds
postal-requeuer-1 ghcr.io/postalserver/postal:2.1.4 “/docker-entrypoint.…” requeuer 25 seconds ago Up 24 seconds
postal-smtp-1 ghcr.io/postalserver/postal:2.1.4 “/docker-entrypoint.…” smtp 25 seconds ago Up 23 seconds
postal-web-1 ghcr.io/postalserver/postal:2.1.4 “/docker-entrypoint.…” web 25 seconds ago Up 23 seconds
postal-worker-1 ghcr.io/postalserver/postal:2.1.4 “/docker-entrypoint.…” worker 25 seconds ago Up 23 seconds
what is wrong why is it not working ????
I need help please – i followed your article but i cannot log in to the web console – mail.gocopynpaste.com
everything says running but nothing is up and running – i am using godaddy for the domain –
http://mail.yourdomain.com:5000 is not working on my all broswer . postal step b step completly install but url not open plz help me.
I’m having a problem with postal now. If it send to AOL it won’t be delivered to Outlook or Hotmail. Also Gmail or if I try to complete all this DNS it will start corrupting
Thank you for the great documentation. I am having one issue after running the caddy docker command i am still not able to ssl cert on the login page http access only
Edit the Caddy config file and replace local IP 127.0.0.1 with your server IP. Save Caddy config and run the command again.
i have followed all setups but it is not accessing on browser and shows me access denied message
Try accessing on http not https
Quick question, is there any ways to monitor if the postal smtp goes down or email sending issues?
Looking forward to hearing from you.
Thanks
Earlier when I set up postal SMTP server on ubuntu 18, everything runs smoothly and fine. After updating to Ubuntu 20, my postal SMTP server is breaking all the time and took lots of time to load the postal dashboard as well. What could be the further solution for this?
Thanks
I installed postal, all works fine, but I’m wondering how to configure IP pool?
How can I make my postal listen on ports 2525 and 587 as well? Currently, it only listens on port 25.
Hey, Can you help me to choose good SMTP server between SMTPmart, Brevo and SMTPget. I am looking for long term investment in email marketing.
Cannot “Build a new mail server” #3295
On a fresh installation of Postal V3, I got error below. And it’s showing on every page and when creating a new mail server, Postal returns error 500 [https://domain.com/servers]. Any help would be appreciated.
please help me