How to install Virtualmin on CentOS 8
Virtualmin is very robust open source control panel. It can be installed on CentOS, Debian, Ubuntu, etc. It runs as module to webmin which is written in perl and provides almost everything required for managing control panel. Once installed you might never need to see command line again even for updating packages. It notifies you as soon as update is available and you can update them with just one click.
Requirement
You need following things to be ready in order to install virtualmin
Now, an immediate question could pop up in your mind. How to decide VPS or cloud specification? Well, it completely depends on the amount of traffic your website could generate. Virtualmin is going to consume roughly 512 MB of RAM. Therefore even at the beginning, I would say go with 2 GB RAM and 1 vCPU at least. In this demonstration, I will be using Contabo VPS with 8 GB RAM, enough for Virtualmin and most applications.
I have my domain registered with namecheap. Check out for deals on domain name registration and hosting.
Updating DNS records
After you receive the IP address from VPS seller login to the domain registrar and create custom nameserver also called hostnames/ child nameservers. For example if inguide.in is your domain name, then you will have to create ns1.inguide.in & ns2.inguide.in and in next field pass on the IP address received.
Next, update the nameserver to newly created custom nameservers that is ns1.inguide.in & ns2.inguide.in
Installation
Before you begin the installation you need to connect to the server, with the details provided by the VPS company. It’s super easy to connect to the server from a Linux machine. But fortunately, we have several open-source application which makes the task easier even for Windows user. One such application is putty. After you have downloaded the putty first step is to connect to VPS from your Windows.
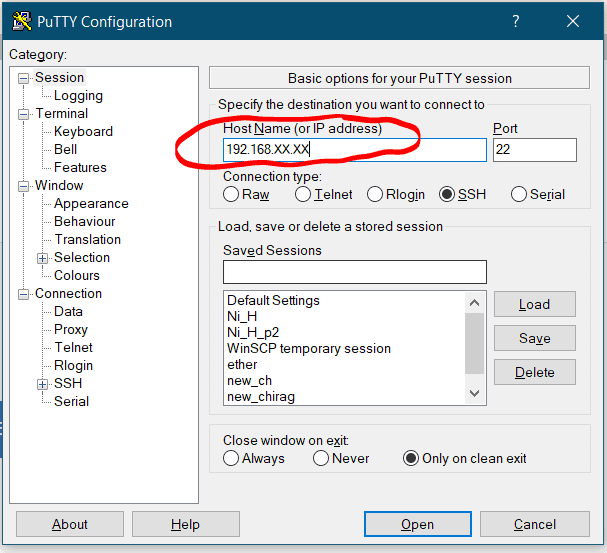
Enter the IP address of your server in the box highlighted in red in above box. A command window will open where you have to enter user name root and password provided by the VPS seller. Sometimes username could be different from root , therefore cross check with VPS seller. If it’s not root then you have to switch to root user with following command.
sudo -i
Next step is to update the server. On CentOS 8 run the following command.
dnf update -y
After that set the hostname
hostnamectl set-hostname server1.inguide.in
Replace inguide.in with your domain name. Now comes the most awaited part. Go to Virtualmin and copy the command. I also have listed it here for convenience.
wget http://software.virtualmin.com/gpl/scripts/install.sh
sudo /bin/sh install.sh
Above command will begin the installation. When asked for confirmation answer yes.
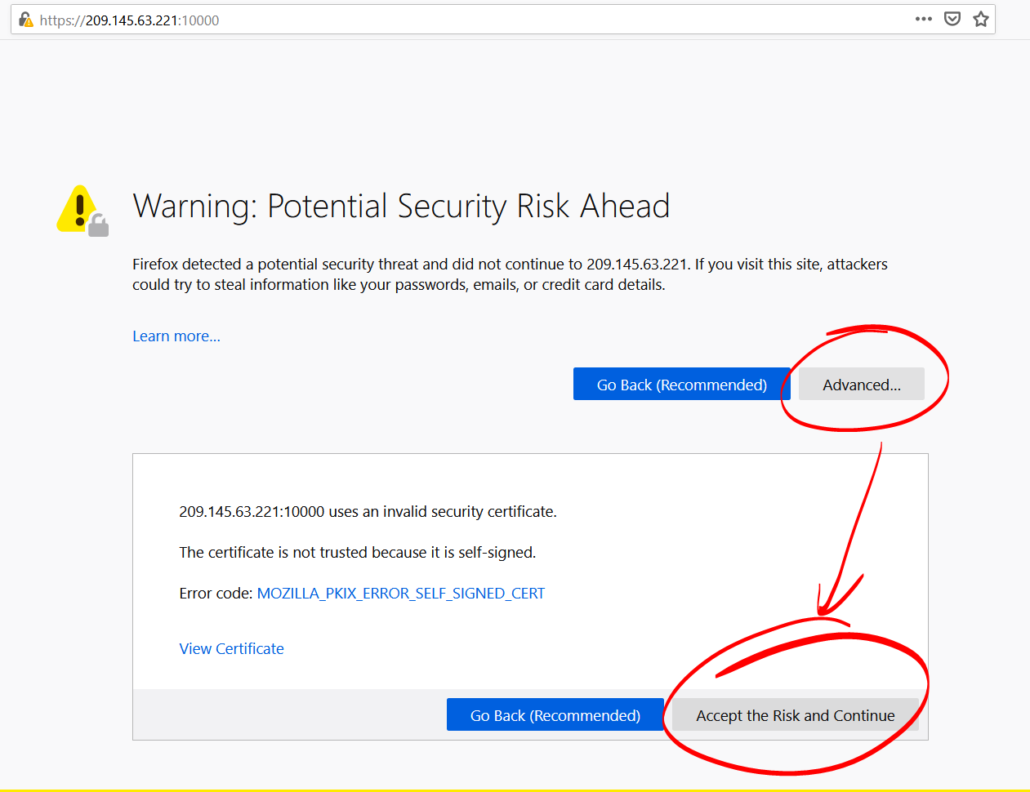
At the end of installation, you will be given an IP address something like this https://192.168.1.1:10000. Open that URL in browser. You will receive warning, click in advanced and proceed.
Configuration
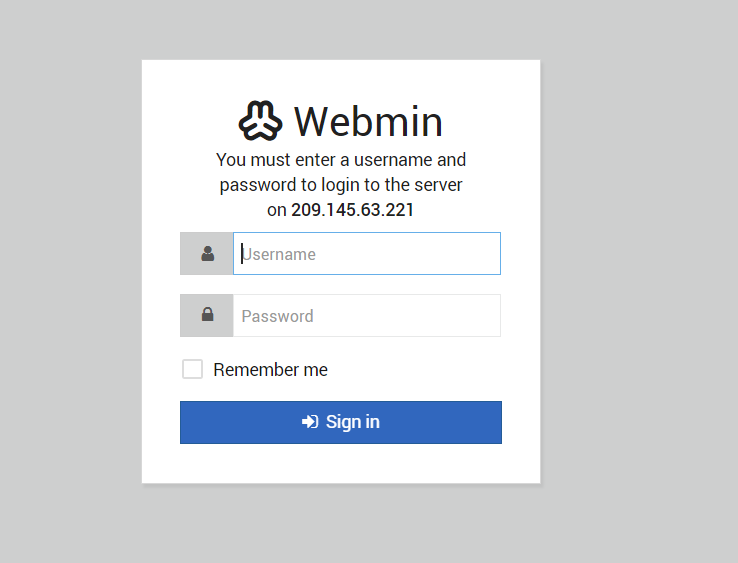
Go to the IP address provided at the end of installation and login with server credentials, that is server username and password.
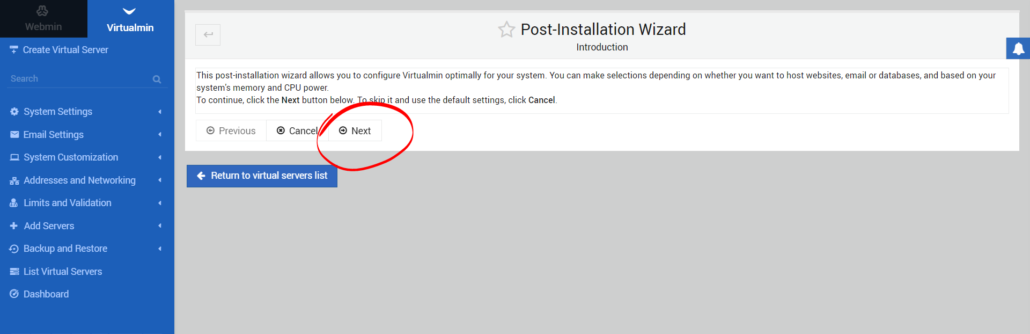
You will be asked several questions during the initial setup.
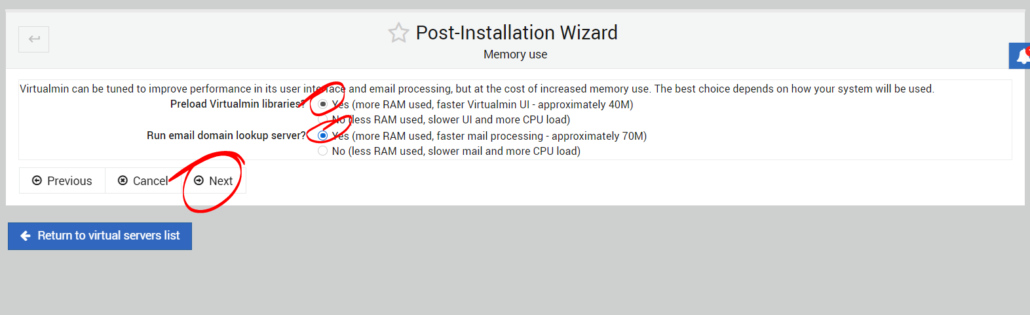
On, next screen make selection according to your server memory, if it’s 1 GB then don’t enable the following features.
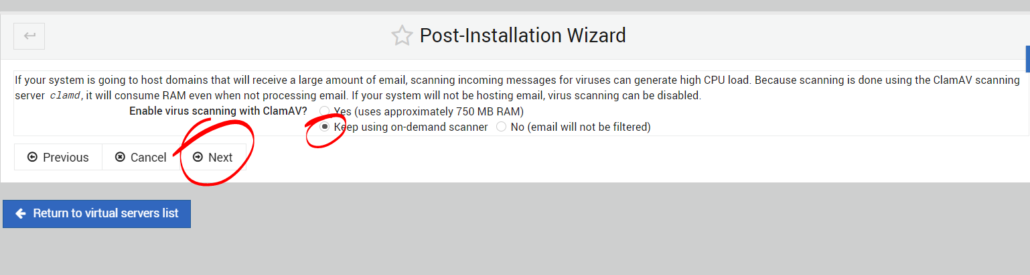
Now, here on following screen it’s up to you to enable ClamAV or not. I like to keep using on demand scanner.
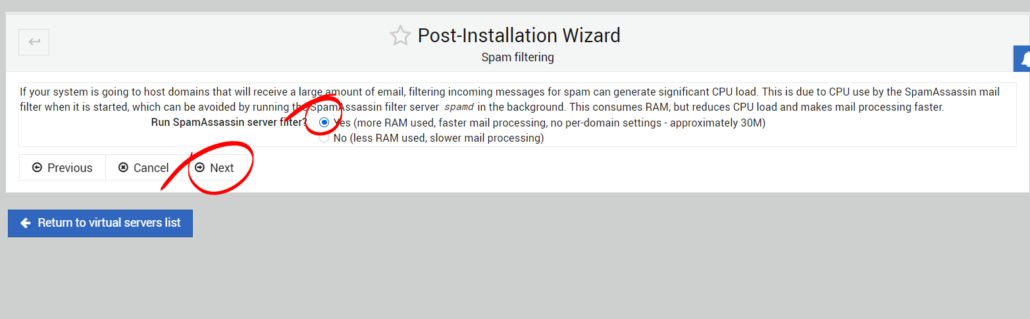
After that, you have enable or disable spam assassin feature.
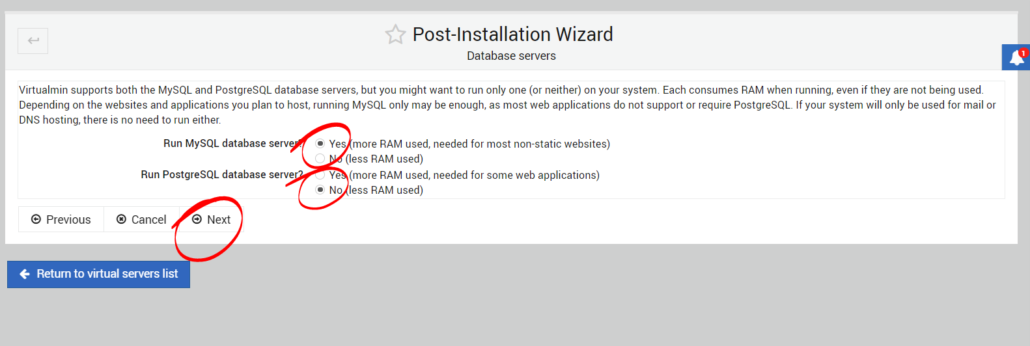
Next, you have option to select among MySQL and PostgreSQL database server. Make your choice and hit next.
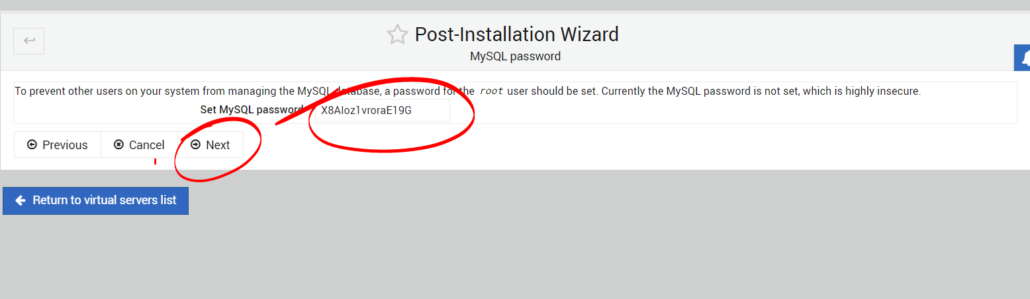
Thereafter, you will have to enter password for MySQL user. Keep this password safe, otherwise you will have to generate it. This will become handy later when you need to create and use a database.
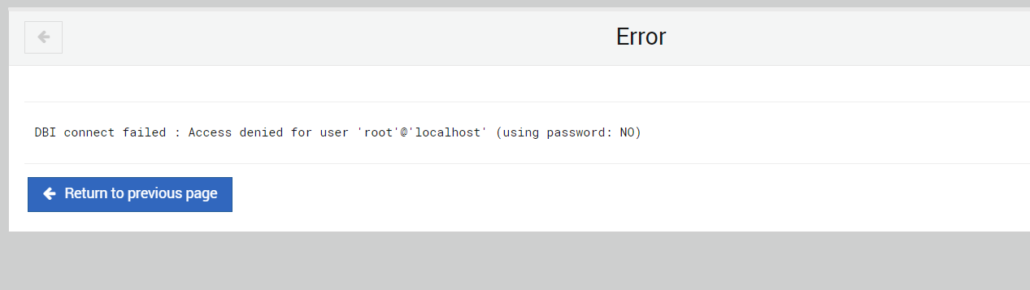
Sometimes, you will receive error like this on next screen
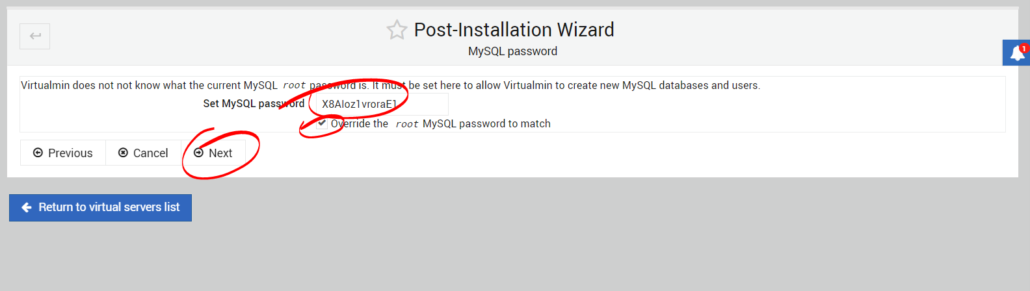
If that is the case with you go to previous page an enter MySQL password once again and check the override box.
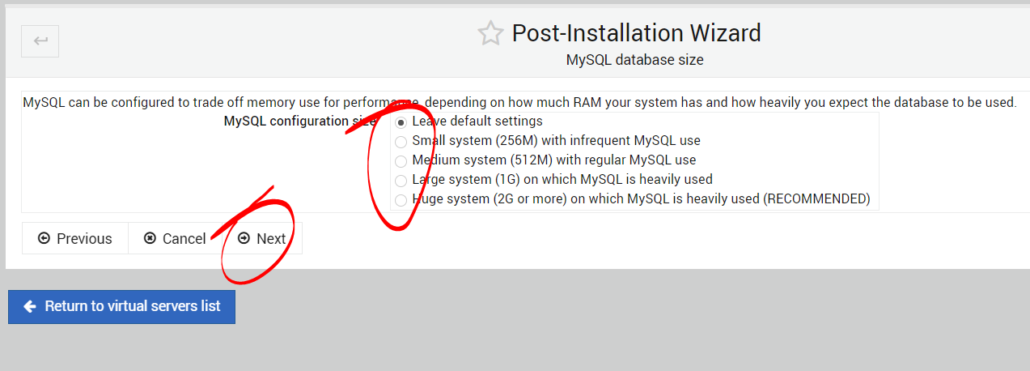
Now, on next screen make wise choice because database connection error depends on this.
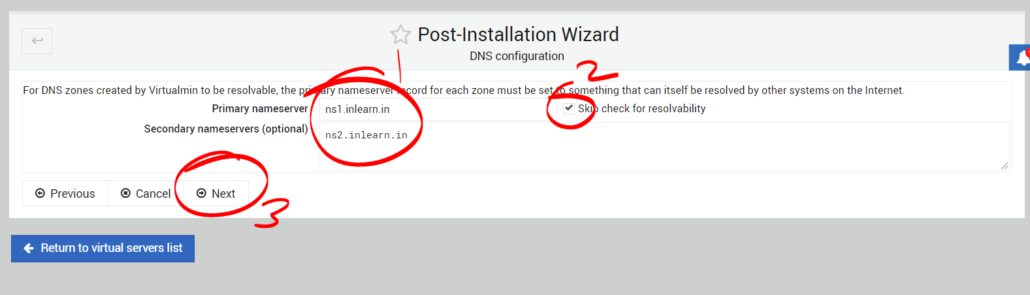
Next, in primary nameservers enter ns1.yourdoman.com and in next field ns2.yourdomain.com. Also check skip for resolvability.
After that, it will ask regarding password storage mode. Make your selection.

Finally, create default virtual server. It could be your domain or FQDN or even subdomain. Also, you have to option to install SSL certificate right now, though you can always install later.

After you finish going through initial configuration wizard, next you refresh the configuration. Now, create ” Virtual Server ” with main domain to finish the configuration.
After that you can install favorite apps on Virtualmin.
Conclusion
Installing virtualmin though seems to be difficult task, is not that hard. With 2 line install command it’s not only easy to install but also serve well the need of a user.AA

 https://storyset.com/marketing
I’m from Brazil and I congratulate you for your website and your videos.
Thanks
Please how do I install on Almalinux 9. Its giving me error when I try this process
Virtualmin doesn’t support ALMALINUX 9 yet, install on ALMALINUX 8.
Thanks
Please tell me is there any similar article about how to connect VirtualMin with MailWizz… I am unable to set up the host name and validate the email in MailWizz… My Hosting is on Contabo and I have use Name Cheap for Domain.. I have set up all advance DNS options…