Install Zimbra on Ubuntu 20.04 Step by Step
In my last article on Zimbra, I already discussed the installation of Zimbra on Centos 7/8. In this article, you will learn to install Zimbra on Ubuntu 20.04/21.04.
Zimbra is open source mailing solution developed by Synacor. It has another edition as well which is the Network edition. However, Zimbra Open source is used by many universities and big companies.
Basically, Zimbra is the best alternative to paid Google Workspace, Office 365, Zoho mail, etc. So, if you like to have your own email server without any fuss, then you should look no further.
Zimbra – System Requirement
- A domain name
- A cloud, VPS, or dedicated server based on your need.
But your system should meet the following minimum configuration as per the Zimbra documentation.
- CPU – 1.5 GHz
- Memory – 8 GB
- Storage – 5 GB for ZCS installation
Initial Domain Setup
First of all create 2 DNS entries in the domain records as follows
| Type | Host | Value |
| A | 1.2.3.4 | |
| MX | @ | mail.inguide.in 10 |
Initial Server Setup
First of all, switch to the root user, just in case you not working as the root user.
root@vmi928964:~# sudo -i
Next, update and upgrade Ubuntu
root@vmi928964:~# apt update && apt upgrade -y
After that, set the hostname
root@vmi928964:~# hostnamectl set-hostname mail.inguide.in
root@vmi928964:~# sudo -i
Now, you need to edit Ubuntu Hosts file
root@mail:~# nano /etc/hosts
The hosts file should contain
127.0.0.1       localhost
127.0.1.1       mail.inguide.in mail
38.242.142.57   mail.inguide.in mail
Install Dnsmasq
Next, we need to install Dnsmasq to create and manage a few DNS records required by Zimbra. We also need to disable systemd-resolve in order to avoid conflict between dnsmasq and systemd-resolve
root@mail:~# systemctl disable systemd-resolved
root@mail:~# systemctl stop systemd-resolved
After disabling, systemd-resolve you need to edit resolv.conf to include the Google DNS server. It’s easy, but on some VPS this config file reset to the default value after reboot or upgrade. Therefore, we are going to first unlink it, then include our content.
root@mail:~# ls -lh /etc/resolv.conf
lrwxrwxrwx 1 root root 39 Jan 20  2021 /etc/resolv.conf -> ../run/systemd/resolve/stub-resolv.conf
You can see it’s symlinked and therefore in order to remove it
root@mail:~# rm -f /etc/resolv.conf
Now create your own resolv.conf
root@mail:~# nano /etc/resolv.conf
Next, insert the following content
nameserver 8.8.8.8
Save and exit with CTRL + X
Now install Dnsmasq
root@mail:~# apt install dnsmasq -y
Configuring Dnsmasq
Take the backup of the existing Dnsmasq config file and edit the file
root@mail:~# cp /etc/dnsmasq.conf /etc/dnsmasq.conf.bak
root@mail:~# nano /etc/dnsmasq.conf
Insert the following content at the bottom and don’t forget to replace the IP address and domain name
server= 38.242.250.63
domain=inguide.in
mx-host= inguide.in, mail.inguide.in, 5
mx-host= mail.inguide.in, mail.inguide.in, 5
listen-address=127.0.0.1
Now save the file. If you run the dig the command you should get the following output
root@mail:~# dig -t A mail.inguide.in

; <<>> DiG 9.16.1-Ubuntu <<>> -t A mail.inguide.in
;; global options: +cmd
;; Got answer:
;; ->>HEADER<<- opcode: QUERY, status: NOERROR, id: 15272
;; flags: qr rd ra; QUERY: 1, ANSWER: 1, AUTHORITY: 0, ADDITIONAL: 1

;; OPT PSEUDOSECTION:
; EDNS: version: 0, flags:; udp: 512
;; QUESTION SECTION:
;mail.inguide.in.              IN      A

;; ANSWER SECTION:
mail.inguide.in.       1799    IN      A       38.242.250.63

;; Query time: 31 msec
;; SERVER: 8.8.8.8#53(8.8.8.8)
;; WHEN: Sun Jul 10 14:59:46 CEST 2022
;; MSG SIZE  rcvd: 61
Next, MX dig should return
root@mail:~# dig -t MX inguide.in

; <<>> DiG 9.16.1-Ubuntu <<>> -t MX inguide.in
;; global options: +cmd
;; Got answer:
;; ->>HEADER<<- opcode: QUERY, status: NOERROR, id: 4658
;; flags: qr rd ra; QUERY: 1, ANSWER: 1, AUTHORITY: 0, ADDITIONAL: 1

;; OPT PSEUDOSECTION:
; EDNS: version: 0, flags:; udp: 512
;; QUESTION SECTION:
;inguide.in.                   IN      MX

;; ANSWER SECTION:
inguide.in.            1799    IN      MX      10 mail.inguide.in.

;; Query time: 35 msec
;; SERVER: 8.8.8.8#53(8.8.8.8)
;; WHEN: Sun Jul 10 14:59:05 CEST 2022
;; MSG SIZE  rcvd: 61
Installing Zimbra Open Source Edition
Now, you need to download Zimbra OSE with the following command. You can always get the latest file from Zimbra Website.
root@mail:~# wget https://files.zimbra.com/downloads/8.8.15_GA/zcs-8.8.15_GA_4179.UBUNTU20_64.20211118033954.tgz
Next, you have to extract the content
root@mail:~# tar xvzf zcs-8.8.15_GA_4179.UBUNTU20_64.20211118033954.tgz
It’s time to install Zimbra
root@mail:~# cd zcs-8.8.15_GA_4179.UBUNTU20_64.20211118033954
root@mail:~/zcs-8.8.15_GA_4179.UBUNTU20_64.20211118033954# ./install.sh
You will be asked to agree to license and a few other questions to whom you have to answer as follows
Do you agree with the terms of the software license agreement? [N] y

Use Zimbra's package repository [Y] y

Warning: apt-key output should not be parsed (stdout is not a terminal)
Importing Zimbra GPG key

Configuring package repository

Checking for installable packages

Found zimbra-core (local)
Found zimbra-ldap (local)
Found zimbra-logger (local)
Found zimbra-mta (local)
Found zimbra-dnscache (local)
Found zimbra-snmp (local)
Found zimbra-store (local)
Found zimbra-apache (local)
Found zimbra-spell (local)
Found zimbra-memcached (repo)
Found zimbra-proxy (local)
Found zimbra-drive (repo)
Found zimbra-imapd (local)
Found zimbra-patch (repo)
Found zimbra-mta-patch (repo)
Found zimbra-proxy-patch (repo)

Select the packages to install

Install zimbra-ldap [Y] y

Install zimbra-logger [Y] y

Install zimbra-mta [Y] y

Install zimbra-dnscache [Y] n

Install zimbra-snmp [Y] y

Install zimbra-store [Y] y

Install zimbra-apache [Y] y

Install zimbra-spell [Y] y

Install zimbra-memcached [Y] y

Install zimbra-proxy [Y] y

Install zimbra-drive [Y] n

Install zimbra-imapd (BETA - for evaluation only) [N] n

Install zimbra-chat [Y] n
Checking required space for zimbra-core
Checking space for zimbra-store
Checking required packages for zimbra-store
zimbra-store package check complete.
Zimbra will ask for confirmation of installation
The system will be modified.  Continue? [N] y

Beginning Installation - see /tmp/install.log.UUJ9kVuj for details...

                          zimbra-core-components will be downloaded and installed.
                            zimbra-timezone-data will be installed.
                   zimbra-common-mbox-conf-attrs will be installed.
                          zimbra-common-core-jar will be installed.
                  zimbra-common-mbox-conf-rights will be installed.
                         zimbra-common-core-libs will be installed.
                    zimbra-common-mbox-conf-msgs will be installed.
                           zimbra-common-mbox-db will be installed.
                         zimbra-common-mbox-docs will be installed.
                   zimbra-common-mbox-native-lib will be installed.
                         zimbra-common-mbox-conf will be installed.
                                     zimbra-core will be installed.
                          zimbra-ldap-components will be downloaded and installed.
                                     zimbra-ldap will be installed.
                                   zimbra-logger will be installed.
                           zimbra-mta-components will be downloaded and installed.
                                      zimbra-mta will be installed.
                      zimbra-dnscache-components will be downloaded and installed.
                                 zimbra-dnscache will be installed.
                          zimbra-snmp-components will be downloaded and installed.
                                     zimbra-snmp will be installed.
                         zimbra-store-components will be downloaded and installed.
                       zimbra-jetty-distribution will be downloaded and installed.
                          zimbra-mbox-store-libs will be installed.
                                zimbra-mbox-conf will be installed.
                   zimbra-mbox-admin-console-war will be installed.
                                 zimbra-mbox-war will be installed.
                       zimbra-mbox-webclient-war will be installed.
                             zimbra-mbox-service will be installed.
                                    zimbra-store will be installed.
                        zimbra-apache-components will be downloaded and installed.
                                   zimbra-apache will be installed.
                         zimbra-spell-components will be downloaded and installed.
                                    zimbra-spell will be installed.
                                zimbra-memcached will be downloaded and installed.
                         zimbra-proxy-components will be downloaded and installed.
                                    zimbra-proxy will be installed.
                                    zimbra-patch will be downloaded and installed                                                                                                                                                                                                             (later).
                                zimbra-mta-patch will be downloaded and installed                                                                                                                                                                                                             (later).
                              zimbra-proxy-patch will be downloaded and installed                                                                                                                                                                                                             (later).

Downloading packages (11):
   zimbra-core-components
   zimbra-ldap-components
   zimbra-mta-components
   zimbra-dnscache-components
   zimbra-snmp-components
   zimbra-store-components
   zimbra-jetty-distribution
   zimbra-apache-components
   zimbra-spell-components
   zimbra-memcached
   zimbra-proxy-components
      ...done

Removing /opt/zimbra
Removing zimbra crontab entry...done.
Cleaning up zimbra init scripts...done.
Cleaning up /etc/security/limits.conf...done.

Finished removing Zimbra Collaboration Server.
Now on the next screen, it will ask you to set Master DNS IP address and Admin Password
Main menu

   1) Common Configuration:
   2) zimbra-ldap:                             Enabled
   3) zimbra-logger:                           Enabled
   4) zimbra-mta:                              Enabled
   5) zimbra-dnscache:                         Enabled
******* +Master DNS IP address(es):            UNSET
        +Enable DNS lookups over TCP:          yes
        +Enable DNS lookups over UDP:          yes
        +Only allow TCP to communicate with Master DNS: no

   6) zimbra-snmp:                             Enabled
   7) zimbra-store:                            Enabled
        +Create Admin User:                    yes
        +Admin user to create:                 [email protected]
******* +Admin Password                        UNSET
        +Anti-virus quarantine user:           [email protected]
        +Enable automated spam training:       yes
        +Spam training user:                   [email protected]
        +Non-spam(Ham) training user:          [email protected]
        +SMTP host:                            mail.inguide.in
        +Web server HTTP port:                 8080
        +Web server HTTPS port:                8443
        +Web server mode:                      https
        +IMAP server port:                     7143
        +IMAP server SSL port:                 7993
        +POP server port:                      7110
        +POP server SSL port:                  7995
        +Use spell check server:               yes
        +Spell server URL:                     http://mail.inguide.in:7780/aspell.php
        +Enable version update checks:         TRUE
        +Enable version update notifications:  TRUE
        +Version update notification email:    [email protected]
        +Version update source email:          [email protected]
        +Install mailstore (service webapp):   yes
        +Install UI (zimbra,zimbraAdmin webapps): yes

   8) zimbra-spell:                            Enabled
   9) zimbra-proxy:                            Enabled
  10) Default Class of Service Configuration:
   s) Save config to file
   x) Expand menu
   q) Quit5
Answer it as follows
Address unconfigured (**) items  (? - help) 5


DNS Cache configuration

   1) Status:                                  Enabled
** 2) Master DNS IP address(es):               UNSET
   3) Enable DNS lookups over TCP:             yes
   4) Enable DNS lookups over UDP:             yes
   5) Only allow TCP to communicate with Master DNS: no

Select, or 'r' for previous menu [r] 2

IP Address(es) of Master DNS Server(s), space separated: 8.8.8.8
Next set Admin Password
Main menu

   1) Common Configuration:
   2) zimbra-ldap:                             Enabled
   3) zimbra-logger:                           Enabled
   4) zimbra-mta:                              Enabled
   5) zimbra-dnscache:                         Enabled
   6) zimbra-snmp:                             Enabled
   7) zimbra-store:                            Enabled
        +Create Admin User:                    yes
        +Admin user to create:                 [email protected]
******* +Admin Password                        UNSET
        +Anti-virus quarantine user:           [email protected]
        +Enable automated spam training:       yes
        +Spam training user:                   [email protected]
        +Non-spam(Ham) training user:          [email protected]
        +SMTP host:                            mail.inguide.in
        +Web server HTTP port:                 8080
        +Web server HTTPS port:                8443
        +Web server mode:                      https
        +IMAP server port:                     7143
        +IMAP server SSL port:                 7993
        +POP server port:                      7110
        +POP server SSL port:                  7995
        +Use spell check server:               yes
        +Spell server URL:                     http://mail.inguide.in:7780/aspell.php
        +Enable version update checks:         TRUE
        +Enable version update notifications:  TRUE
        +Version update notification email:    [email protected]
        +Version update source email:          [email protected]
        +Install mailstore (service webapp):   yes
        +Install UI (zimbra,zimbraAdmin webapps): yes

   8) zimbra-spell:                            Enabled
   9) zimbra-proxy:                            Enabled
  10) Default Class of Service Configuration:
   s) Save config to file
   x) Expand menu
   q) Quit

Address unconfigured (**) items  (? - help) 7


Store configuration

   1) Status:                                  Enabled
   2) Create Admin User:                       yes
   3) Admin user to create:                    [email protected]
** 4) Admin Password                           UNSET
   5) Anti-virus quarantine user:              [email protected]
   6) Enable automated spam training:          yes
   7) Spam training user:                      [email protected]
   8) Non-spam(Ham) training user:             [email protected]
   9) SMTP host:                               mail.inguide.in
  10) Web server HTTP port:                    8080
  11) Web server HTTPS port:                   8443
  12) Web server mode:                         https
  13) IMAP server port:                        7143
  14) IMAP server SSL port:                    7993
  15) POP server port:                         7110
  16) POP server SSL port:                     7995
  17) Use spell check server:                  yes
  18) Spell server URL:                        http://mail.inguide.in:7780/aspell.php
  19) Enable version update checks:            TRUE
  20) Enable version update notifications:     TRUE
  21) Version update notification email:       [email protected]
  22) Version update source email:             [email protected]
  23) Install mailstore (service webapp):      yes
  24) Install UI (zimbra,zimbraAdmin webapps): yes

Select, or 'r' for previous menu [r] 4
Next, either accept the generated pass or enter the new one
Password for [email protected] (min 6 characters): [m3XShBkX]

Store configuration

   1) Status:                                  Enabled
   2) Create Admin User:                       yes
   3) Admin user to create:                    [email protected]
   4) Admin Password                           set
   5) Anti-virus quarantine user:              [email protected]
   6) Enable automated spam training:          yes
   7) Spam training user:                      [email protected]
   8) Non-spam(Ham) training user:             [email protected]
   9) SMTP host:                               mail.inguide.in
  10) Web server HTTP port:                    8080
  11) Web server HTTPS port:                   8443
  12) Web server mode:                         https
  13) IMAP server port:                        7143
  14) IMAP server SSL port:                    7993
  15) POP server port:                         7110
  16) POP server SSL port:                     7995
  17) Use spell check server:                  yes
  18) Spell server URL:                        http://mail.inguide.in:7780/aspell.php
  19) Enable version update checks:            TRUE
  20) Enable version update notifications:     TRUE
  21) Version update notification email:       [email protected]
  22) Version update source email:             [email protected]
  23) Install mailstore (service webapp):      yes
  24) Install UI (zimbra,zimbraAdmin webapps): yes
Now you will be asked a few more questions.
Select, or 'r' for previous menu [r] r

Main menu

   1) Common Configuration:
   2) zimbra-ldap:                             Enabled
   3) zimbra-logger:                           Enabled
   4) zimbra-mta:                              Enabled
   5) zimbra-dnscache:                         Enabled
   6) zimbra-snmp:                             Enabled
   7) zimbra-store:                            Enabled
   8) zimbra-spell:                            Enabled
   9) zimbra-proxy:                            Enabled
  10) Default Class of Service Configuration:
   s) Save config to file
   x) Expand menu
   q) Quit

*** CONFIGURATION COMPLETE - press 'a' to apply
Select from menu, or press 'a' to apply config (? - help) a
Save configuration data to a file? [Yes]
Save config in file: [/opt/zimbra/config.21298]
Saving config in /opt/zimbra/config.21298...done.
The system will be modified - continue? [No] yes
At the end of the installation, you will be asked whether you would like to notify Zimbra. Answer and your installation will be complete in a few more minutes.
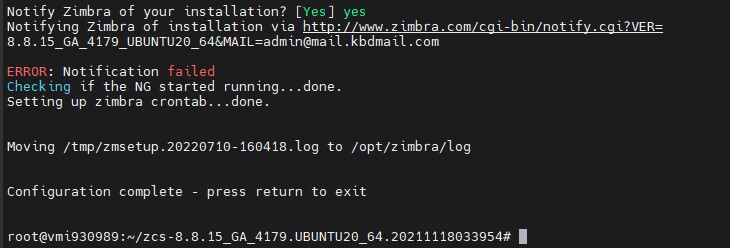
Now, you can open access Zimbra from the browser. Go to https://mail.inguide.in:7071 and enter the user name admin and chosen password. You will receive SSL warning accept and proceed.
If you are unable to access then the firewall might be running. You need to allow the port to accept traffic.
root@mail:~# service ufw status
● ufw.service - Uncomplicated firewall
     Loaded: loaded (/lib/systemd/system/ufw.service; enabled; vendor preset: enabled)
     Active: active (exited) since Sun 2022-07-10 15:51:30 CEST; 2h 57min ago
       Docs: man:ufw(8)
   Main PID: 260 (code=exited, status=0/SUCCESS)
      Tasks: 0 (limit: 9479)
     Memory: 0B
     CGroup: /system.slice/ufw.service
Allow ports through the firewall
root@mail:~# ufw allow 25,80,110,143,443,465,587,993,995,5222,5223,9071,7071/tcp
Rules updated
Rules updated (v6)
Post Installation Configurations:
For post-installation configuration you can follow the instructions for Zimbra on CentOS installation.
SSL Installation
I already have covered the installation of SSL on Zimbra in detail. You can follow this guide.
Conclusion
It’s fairly easy to install Zimbra on Ubuntu compared to CentOS. But it will depend more on taste of developer.


Thank you so much very helpful blog
You should mention that server IP in dnsmasq.conf is the IP of your upstream DNS server. If you use your own IP it may work depending on your config but isn’t right. I ran zimbra for 6 months as a hosted VM using this guide then moved it to a VM on FreeBSD bhyve using ipfw. to forward ports and NAT. It worked but as I added more domains and aliases the proxy and zmconfiigd refused to start. I spent a week or more and reinstalled about 10 times, finally realized removing an allas and it starts, adding the alias back and it won’t restart. Thought it might be DNS so messed with the hosts file, resolv.conf and DNS was very slow. Looked up what server= meant, changed this to server=8.8.8.8 and DNS was faster and everything works!
Thank you for the elaborate steps to install Zimbra on ubuntu server.
I am installing zimbra in ubuntu in Microsoft Azure. the private ip addresses for the azure vm server are as follows:
private IP address 10.1.0.4
Public IP address 20.42.84.52
—————————————–
The domain am using is opic-cm.org
I have added the following records on the domain name host:
A record : mail.opic-cm.org. 14400 A 10.1.0.4
mail.opic-cm.org. 14400 MX Priority: 10 Destination: mail.opic-cm.org
nameservers: 8.8.8.8
——————————————————————————————————————-
The installation succeede without any problem as per your instructions in the tutorial, but the zimbra istallation is not opening in the browser despite after configuring the firewall as prescribed. Please from my configuration where have I really gone wrong and what may I do to run zimbra. Thanks.
Thank you !! very helpful