
Build Your Own Torrent Downloader using Transmission Client
Recently, I wanted to download CentOS image, but owing to the large file I thought torrent download would be easier. But my service provider doesn’t allow torrent connection. So, what’s the solution?
Luckily we have transmission torrent client which can be installed on any Linux server. Fun fact is that you need not necessarily buy new Linux server for transmission client. You can install it along side with your application without any issue at all. Just in case if you don’t have any Linux server, then check out this VPS hosting which charges $1/month.
If you look at online torrent downloader, they charge you from $5 per month onwards for unlimited download and unlimited file size. With your own server you have full freedom to download as many torrent as you want and download speed will drive you crazy.
So, let’s begin building your own torrent downloader using transmission client. First of all you need to identify your Linux OS and then follow the guide accordingly.
Installing Torrent Transmission Client on Ubuntu
First of all update the system. If you don’t know how to access remote server, then you can refer to this tutorial.
sudo apt update -y
Install Transmission
sudo apt-get install transmission-cli transmission-common transmission-daemon
Now, stop the transmission
sudo service transmission-daemon stop
Next edit the settings file to make following changes
sudo nano /var/lib/transmission-daemon/info/settings.json
You will see output like below
{
    "alt-speed-down": 50,
    "alt-speed-enabled": false,
    "alt-speed-time-begin": 540,
    "alt-speed-time-day": 127,
    "alt-speed-time-enabled": false,
    "alt-speed-time-end": 1020,
    "alt-speed-up": 50,
    "bind-address-ipv4": "0.0.0.0",
    "bind-address-ipv6": "::",
    "blocklist-enabled": false,
    "blocklist-url": "http://www.example.com/blocklist",
    "cache-size-mb": 4,
    "dht-enabled": true,
    "download-dir": "/var/lib/transmission-daemon/downloads",
    "download-limit": 100,
    "download-limit-enabled": 0,
    "download-queue-enabled": true,
    "download-queue-size": 5,
    "encryption": 1,
    "idle-seeding-limit": 30,
    "idle-seeding-limit-enabled": false,
    "incomplete-dir": "/var/lib/transmission-daemon/Downloads",
    "incomplete-dir-enabled": false,
    "lpd-enabled": false,
    "max-peers-global": 200,
    "message-level": 1,
    "peer-congestion-algorithm": "",
    "peer-id-ttl-hours": 6,
    "peer-limit-global": 200,
    "peer-limit-per-torrent": 50,
    "peer-port": 51413,
    "peer-port-random-high": 65535,
    "peer-port-random-low": 49152,
    "peer-port-random-on-start": false,
    "peer-socket-tos": "default",
    "pex-enabled": true,
    "port-forwarding-enabled": false,
    "preallocation": 1,
    "prefetch-enabled": true,
    "queue-stalled-enabled": true,
    "queue-stalled-minutes": 30,
    "ratio-limit": 2,
    "ratio-limit-enabled": false,
    "rename-partial-files": true,
    "rpc-authentication-required": true,
    "rpc-bind-address": "0.0.0.0",
    "rpc-enabled": true,
    "rpc-host-whitelist": "",
    "rpc-host-whitelist-enabled": true,
    "rpc-password": "{e9b3b9c4411dd33d01cd5997e36152fce3cdc887smVY2tx8",
    "rpc-port": 9091,
    "rpc-url": "/transmission/",
    "rpc-username": "transmission",
    "rpc-whitelist": "127.0.0.1",
    "rpc-whitelist-enabled": true,
    "scrape-paused-torrents-enabled": true,
    "script-torrent-done-enabled": false,
    "script-torrent-done-filename": "",
    "seed-queue-enabled": false,
    "seed-queue-size": 10,
    "speed-limit-down": 100,
    "speed-limit-down-enabled": false,
    "speed-limit-up": 100,
    "speed-limit-up-enabled": false,
    "start-added-torrents": true,
    "trash-original-torrent-files": false,
    "umask": 18,
    "upload-limit": 100,
    "upload-limit-enabled": 0,
    "upload-slots-per-torrent": 14,
    "utp-enabled": true
}
In above file look for line and make changes as follows
"rpc-password": “Type your password here”
"rpc-username": “your username”
"rpc-whitelist-enabled": true
You can also specify download directory, which is by default as follows.
"download-dir": “/var/lib/transmission-daemon/downloads”
After above setting save (CTRL+X) and exit (Yes) the file. And then restart the transmission
sudo service transmission-daemon start
Add firewall rules
sudo ufw allow 9091
Now go to the browser and access http://IP_address:9091
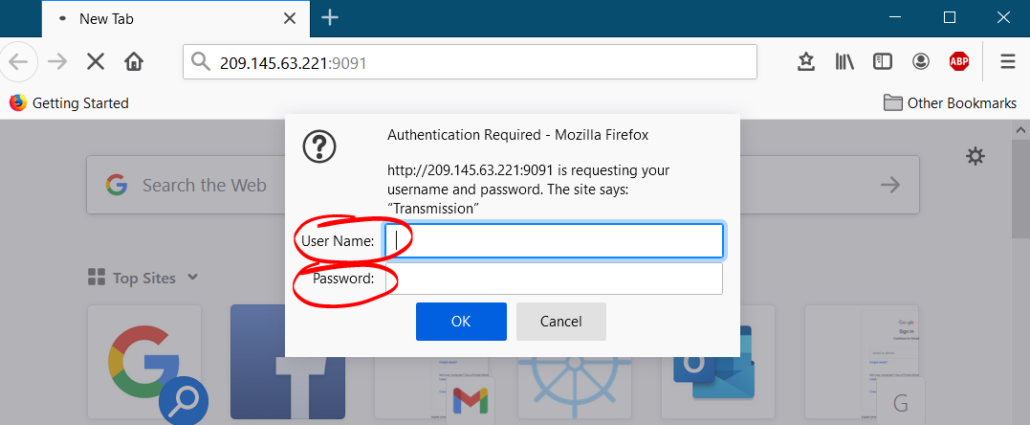
Enter your username and password and start downloading torrent.
Installing Torrent Transmission Client on CentOS
Here again first of all update the system. Also you will need SSH client like Putty to connect to remote server.
sudo yum update -y
Install Transmission
sudo yum install transmission-cli transmission-common transmission-daemon -y
Now, stop the transmission
sudo service transmission-daemon stop
Next edit the settings file to make following changes
sudo nano /var/lib/transmission-daemon/info/settings.json
You will see output like below
{
    "alt-speed-down": 50,
    "alt-speed-enabled": false,
    "alt-speed-time-begin": 540,
    "alt-speed-time-day": 127,
    "alt-speed-time-enabled": false,
    "alt-speed-time-end": 1020,
    "alt-speed-up": 50,
    "bind-address-ipv4": "0.0.0.0",
    "bind-address-ipv6": "::",
    "blocklist-enabled": false,
    "blocklist-url": "http://www.example.com/blocklist",
    "cache-size-mb": 4,
    "dht-enabled": true,
    "download-dir": "/var/lib/transmission-daemon/downloads",
    "download-limit": 100,
    "download-limit-enabled": 0,
    "download-queue-enabled": true,
    "download-queue-size": 5,
    "encryption": 1,
    "idle-seeding-limit": 30,
    "idle-seeding-limit-enabled": false,
    "incomplete-dir": "/var/lib/transmission-daemon/Downloads",
    "incomplete-dir-enabled": false,
    "lpd-enabled": false,
    "max-peers-global": 200,
    "message-level": 1,
    "peer-congestion-algorithm": "",
    "peer-id-ttl-hours": 6,
    "peer-limit-global": 200,
    "peer-limit-per-torrent": 50,
    "peer-port": 51413,
    "peer-port-random-high": 65535,
    "peer-port-random-low": 49152,
    "peer-port-random-on-start": false,
    "peer-socket-tos": "default",
    "pex-enabled": true,
    "port-forwarding-enabled": false,
    "preallocation": 1,
    "prefetch-enabled": true,
    "queue-stalled-enabled": true,
    "queue-stalled-minutes": 30,
    "ratio-limit": 2,
    "ratio-limit-enabled": false,
    "rename-partial-files": true,
    "rpc-authentication-required": true,
    "rpc-bind-address": "0.0.0.0",
    "rpc-enabled": true,
    "rpc-host-whitelist": "",
    "rpc-host-whitelist-enabled": true,
    "rpc-password": "{e9b3b9c4411dd33d01cd5997e36152fce3cdc887smVY2tx8",
    "rpc-port": 9091,
    "rpc-url": "/transmission/",
    "rpc-username": "transmission",
    "rpc-whitelist": "127.0.0.1",
    "rpc-whitelist-enabled": true,
    "scrape-paused-torrents-enabled": true,
    "script-torrent-done-enabled": false,
    "script-torrent-done-filename": "",
    "seed-queue-enabled": false,
    "seed-queue-size": 10,
    "speed-limit-down": 100,
    "speed-limit-down-enabled": false,
    "speed-limit-up": 100,
    "speed-limit-up-enabled": false,
    "start-added-torrents": true,
    "trash-original-torrent-files": false,
    "umask": 18,
    "upload-limit": 100,
    "upload-limit-enabled": 0,
    "upload-slots-per-torrent": 14,
    "utp-enabled": true
}
In above file look for line and make changes as follows
"rpc-password": “Type your password here”
"rpc-username": “your username”
"rpc-whitelist-enabled": true
You can also specify download directory, which is by default as follows.
"download-dir": “/var/lib/transmission-daemon/downloads”
After above setting save (CTRL+X) and exit (Yes) the file. And then restart the transmission
sudo service transmission-daemon start
Update firewall rule
sudo firewall-cmd --permanent --zone=public --add-port=9091/tcp
Now go to the browser and access http://IP_address:9091
Enter your username and password and start downloading torrent.
Conclusion
It’s super easy to install torrent transmission client on Linux machine. You can take advantage of super fast download speed without any restrictions.
Leave a Reply
Want to join the discussion?Feel free to contribute!